
Free 3D Piping CLASS – No Strings Attached – 3d pipeline drawing
Learn how to create a 3D Piping Spool in just a few steps, without having to draw it by hand. Even if you know nothing about 3D.
Our 6 day FREE piping class will take you through
The steps you need to follow to draw a 3D piping spool …
What You’ll Get In Our 6 Days Of Piping Class

You’ll receive 6 piping lessons which you’ll be able to access anytime. You’ll be able to learn at your own pace and return to classes to review if needed.

We’ll provide you with a couple of starter lessons to warm up, and we encourage you to follow along. Easy-to-follow examples are also provided for practice.

You’ll also receive one email each day for 6 days to remind you to practice! We’ll help keep you on track too. Please feel free to ask questions anytime.
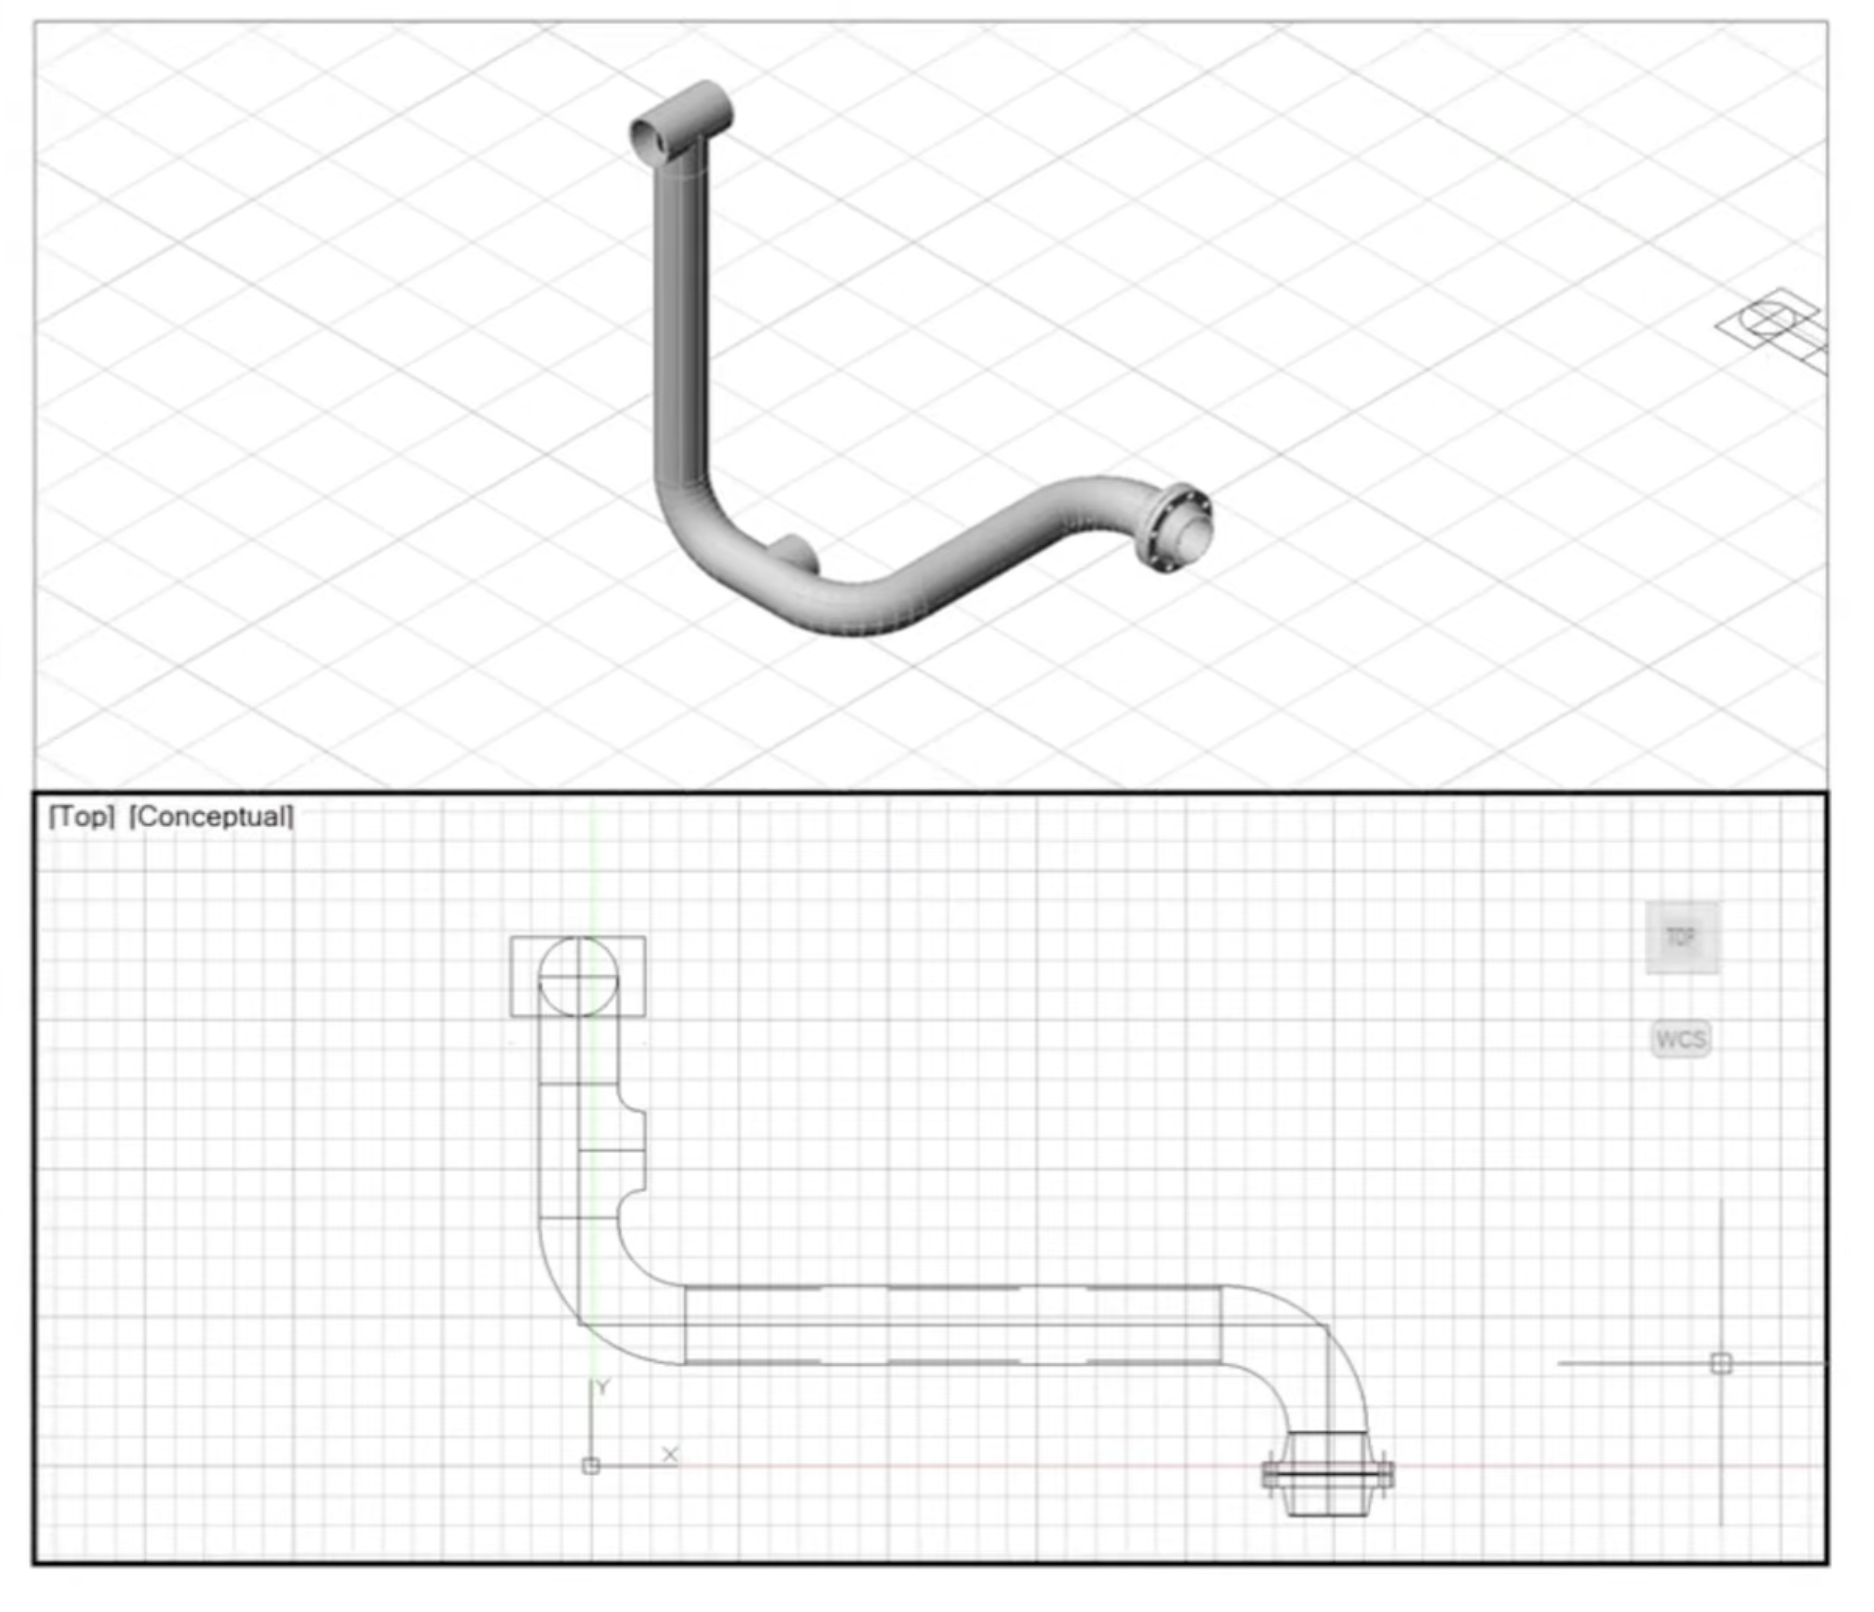
Here’s what you’ll build
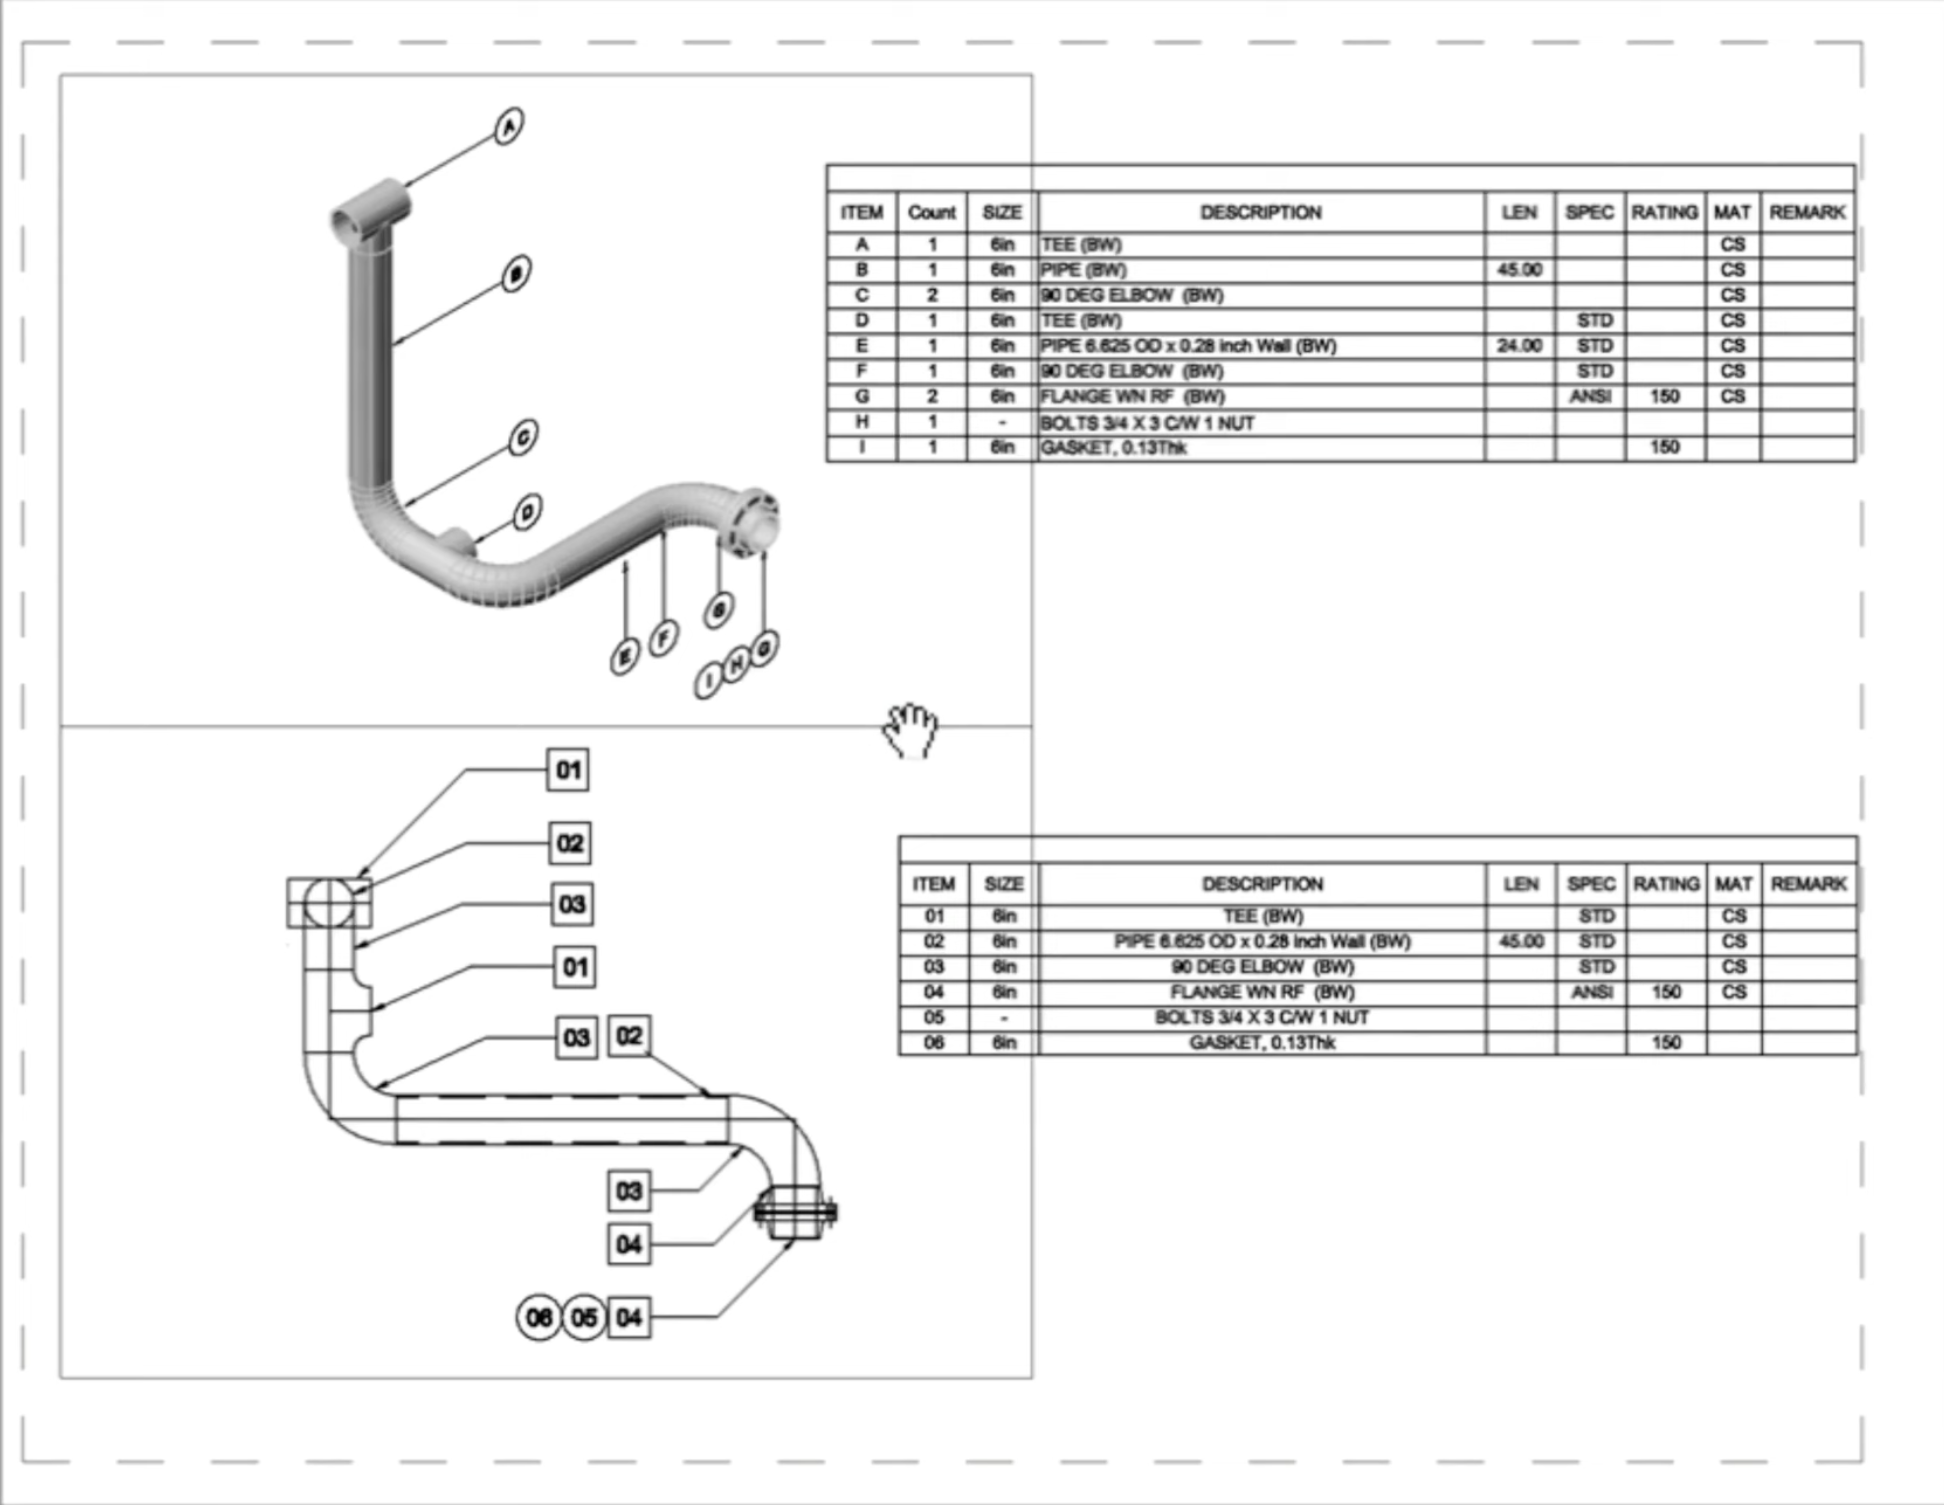
A real 6-inch piping spool with tees, elbows and a flanged connection. You’ll draw it in 3D, then finish it as a drawing with balloons and a bill of materials.
What you’ll learn each day
- Day 1: 3D Piping, What’s Ahead. See the spool you’ll build and watch an example of 3D pipe input from start to finish.
- Day 2: Control the Cursor (Object Snaps). Dive into the snap settings so every pipe and fitting connects exactly where it should.
- Day 3: Type Distances, Stop Guessing. Learn direct distance entry: point in a direction, type a length and get an exact run every time.
- Day 4: Practice + Editing Basics. Put snaps and distances to work, then learn the basic edits to move, copy and fix your piping.
- Day 5: Piping Spool Input. Draw the full spool in 3D, with pipe, elbows, tees and a flanged connection.
- Day 6: Create a Piping BOM Fast. Balloon the spool and generate a bill of materials table automatically.
Common questions about the class
1. What is the 3D Piping Class and who is it for?
The 3D Piping Class is a free course for learning how to create a 3D Piping Spool without having to draw it by hand. It is for anyone who wants to learn, even if they know nothing about 3D CAD or piping.
2. How long is the course and what does it cover?
The course is 6 days long. It covers object snaps, typing exact distances, basic editing, drawing a full 3D piping spool and creating a bill of materials.
3. Do I need any prior knowledge of 3D CAD or piping to take this course?
No prior knowledge of 3D CAD or piping is required to take this course. If you need to learn more common CAD techniques we can help you with additional 10 minute lessons.
4. What kind of support is available during the course if I have questions or need help?
Extra help is available during the course if needed. Students can email/call for support.
5. Will I receive any materials to help me practice and review what I learn in the course?
Students will receive a starter DWG file and easy-to-follow homework examples for extra practice.
6. What is included in the starter DWG file provided with the course?
The starter DWG file provided with the course includes spec’d piping fittings for a real-world CAD project.
7. Can I access the piping class materials at any time and learn at my own pace?
Yes, students can access the course materials at any time and learn at their own pace.
8. What kind of software or tools will I need to complete the course?
Students will need access to 2D/3D CAD software and the Mech-Q add-on. It’s completely free to use for 30 days. Extensions also available.
9. How will this course benefit me in my CAD career or personal projects?
This course will benefit you by providing the foundation you need to create 3D piping spools and 3D pipeline drawings. Although we are using CAD tools, the process is the same. Learning a handful of tips and practice will take you to the next level.
10. Is there a cost for this course or is it completely free?
The course is completely free with no strings attached. There is no catch, we simply want you to learn how to draw in 3D more efficiently.
Don’t be left behind.
Six short lessons, one a day, straight to your inbox.
Get 6 Days of PipingEnroll now, it’s free