What is an AutoCAD tool palette?
A tool palette is a sidebar are in the AutoCAD user interface which allows you to access an array of tools, commands, and custom routines. Tool palettes allow you to access your most frequently used tools and commands quickly.
An array of tools are already available when you first access the tool palette. Default tools such as commands to create geometric objects, various block libraries and even a few custom tools, just to name a few. These can be easily accessed from the tool palette with a mouse click.
As shown in my video above, using the CUI editor, tool palettes in AutoCAD (or AViCAD our alternative) can be customized to include favorite tools and commands you use on a typical project.
You can even share your tool palettes with others,. Customized palettes can also be saved as a tool palette file, which can be stored on a network location and accessed by other users if needed.
How to activate the tool palette with a keystroke
The quickest way to activate the tool palette in AutoCAD (or AViCAD) is with a keyboard shortcut – pressing CTRL 3. This shortcut will both open and close the tool palette window.
Another shortcut you can type is TP or TOOLPALETTES command directly into the command window, and this will also open the tool palette in the same way.
Once the tool palette is open, you can dock the palette to the left or right side of the drawing window by dragging the title bar to the location you need.
How to create a new, blank palette
In AutoCAD, creating a new, blank palette is quick and easy process that allows you to customize your own tool set. Here’s how to do it:
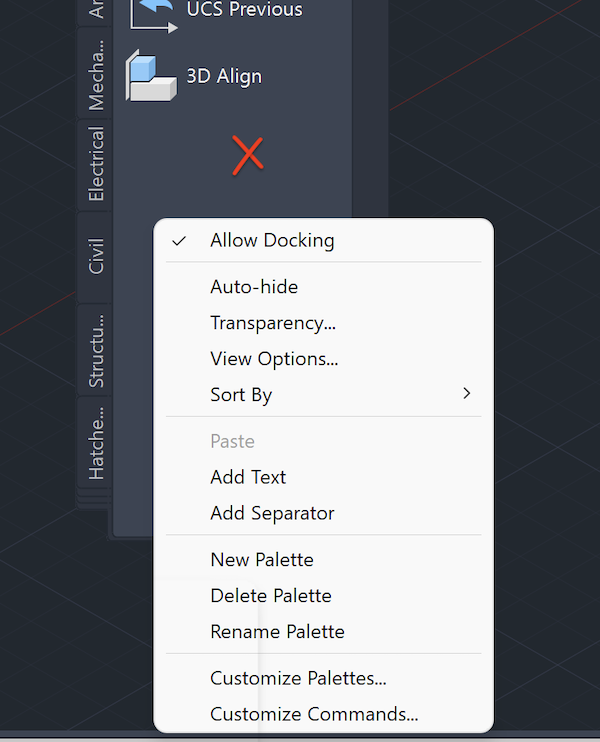
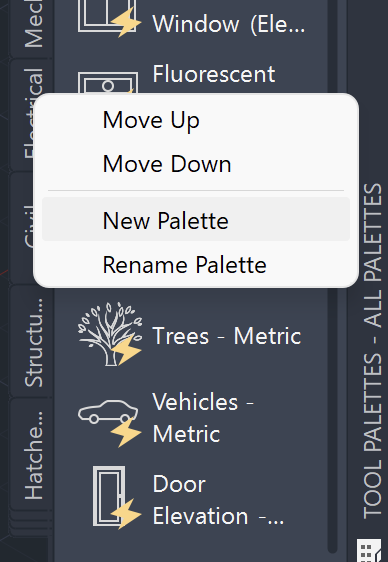
First, activate the tool palettes window using the shortcuts mentioned above. Once the palette is open, right-click on any tab on the left side and select “New Palette”. This will bring up a box where you can enter a name for your new palette. After you’ve entered the name, press Enter.
You will now see a blank tool palette within the window that you can customize to your liking. With your new blank palette, you can simply click and drag toolbar buttons, objects, scripts, macros or commands that you need, directly onto your palette.
To access the CUI (Customize User Interface) in AutoCAD type CUI. This will bring up the CUI editor, which will contain a tree of panels, toolbars and commands.
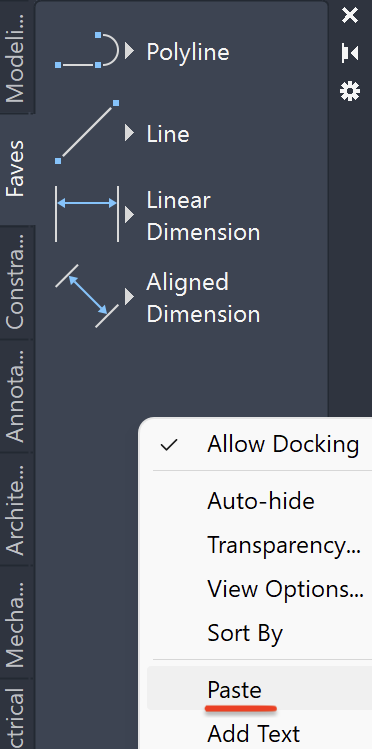
Tip: Another way to access the CUI window is to simply right-click on the blank space in the tool palette and select “Customize Commands” from the menu.
As shown the video, with your mouse, you simply drag a toolbar or other item into the palette. Make sure expand the tree and then drag an item and not the entire toolbar.
Congrats, now you have quick access to the tools you use most often!
How to organize your tool palette using a palette group
By creating a palette group, you can keep similar palettes all in one place for easy access. You can also load the CUI editor and drag and drop existing palette items you have already made into a group.
To create a palette group, make sure you are in the Customize Palette dialog. Then on right group pane, minimize the bottom group and right-click on the blank space. Then from the drop-down menu that appears, select “New Palette Group”.
Next you’ll be prompted to give your new group a name. Choose a name that describes the group, then click OK.
Lastly you can drag and drop the palettes you need into to the group. Working from the left pane, drag the palette to the right side and into the group you want the palette to be a part of.
How to further customize your palette
If you prefer to have your tools in a specific order, you can rearrange them by dragging and dropping them to their desired locations on your custom palette. This way, the tools you use most often will be easy to find and quickly accessible.
You can also use separator lines to organize the tools within your custom tool palette. This way, you can group related tools together and make it even easier to find what you need. To add separators just right click on the palette on a blank space and select separator from drop down.

What items can you drag into your tool palette?
As mentioned in the demo above, most items from CUI can be dragged into Tool Palette such as commands, toolbars, menus, and macros.
Other items that can be dragged into an AutoCAD tool palette include commonly used drawing tools such as text, dimension, line, circle, arc, and the polygon for example. Instead of dragging objects you can also copy and paste (CTRL-C and CTRL-V) objects from your drawing into your palette.

In addition to basic tools, the AutoCAD tool palette can also contain more complex tools such as blocks, hatches and even dimension styles.
For example, you might have a saved block of a dimension with style attached. First drag your block into the tool palette from a central block folder – then after exploding the block, you will see a style is created.
Tip: To auto explode the block from the palette you can also right click on the properties of the item and set Explode to Yes.
Saving and sharing our palettes
As you create, customize and arrange your tool palette in AutoCAD, you might want to save a copy of your palette for backup or install it to another workstation. Fortunately both AutoCAD and AViCAD provide features that allow you to save and share your custom palettes with ease.
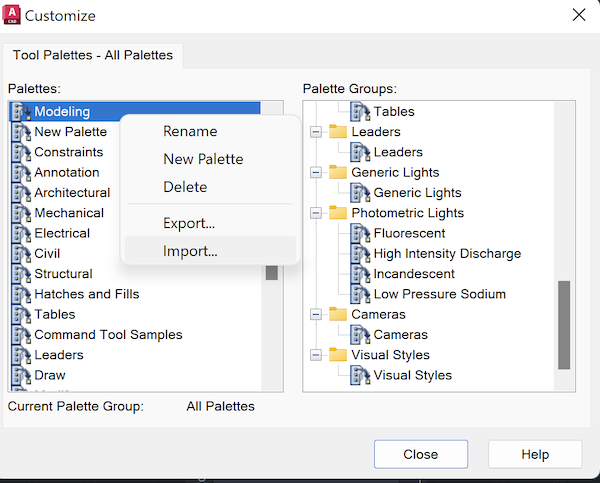
To export your custom tool palette, first right-click on any blank space in the tool palette and select “Customize Palette” from the menu.

From the you Customize dialog box you can right click on the palette to save and choose the Export option. Choose a preferred location to save the tool palette file and give it a name and click “Save”. I recommend saving the each palette and not the group so you can very each saved.
Once you’ve saved the palette file, it can be backed up to a folder and then shared via email. If on a network, stored it in a shared network location, making it easy for others to access and import the palette.
To import a tool palette from a file, open repeat same the steps above but choose Import option from the Customize dialog box and navigate to the location where you saved the file. Click on the file to select it and click “Open” to import the tool palette. Once the palette is imported, it will be available in the Tool Palette window for use.
Note: When sharing tool palettes, it is important to ensure that your blocks are in one location so that they can easily be accessed by everyone. Having a central location for blocks also allows easier maintenance, as changes can be made in one place and immediately reflected across all projects that use those blocks.
Important Note: It is also important backed-up both tool palettes and block folder locations to an external hard drive or cloud storage service like G Drive, OneDrive or similar.
Other related video about Tool Palettes